Direct Account Linking
Borrowers connect payroll or bank accounts within TidalWave’s SOLO interface. Skipped steps automatically create follow-up tasks.
Automated Report Delivery
VOIE and VOA reports with pay stubs and W-2s delivered automatically upon connection
GSE-Ready
Employment and income data formatted for Fannie Mae DU® and Freddie Mac LPA® submissions directly from TidalWave
Customizable Workflows
Configure branding, templates, and notification preferences through the Truv Dashboard
How it works
Borrower connects accounts
Within TidalWave’s SOLO interface, borrowers connect their payroll or bank accounts using Truv’s embedded bridge. If a borrower skips verification, TidalWave automatically creates a follow-up task.
Reports generated and delivered
Upon connection, Truv delivers VOIE and VOA reports, including employment data, pay stubs, and W-2s formatted for GSE standards, directly into TidalWave.
Go Live with Truv in TidalWave
Configure templates
Set up verification templates with your branding and Template IDs in the Truv Dashboard.
TidalWave Setup Guide
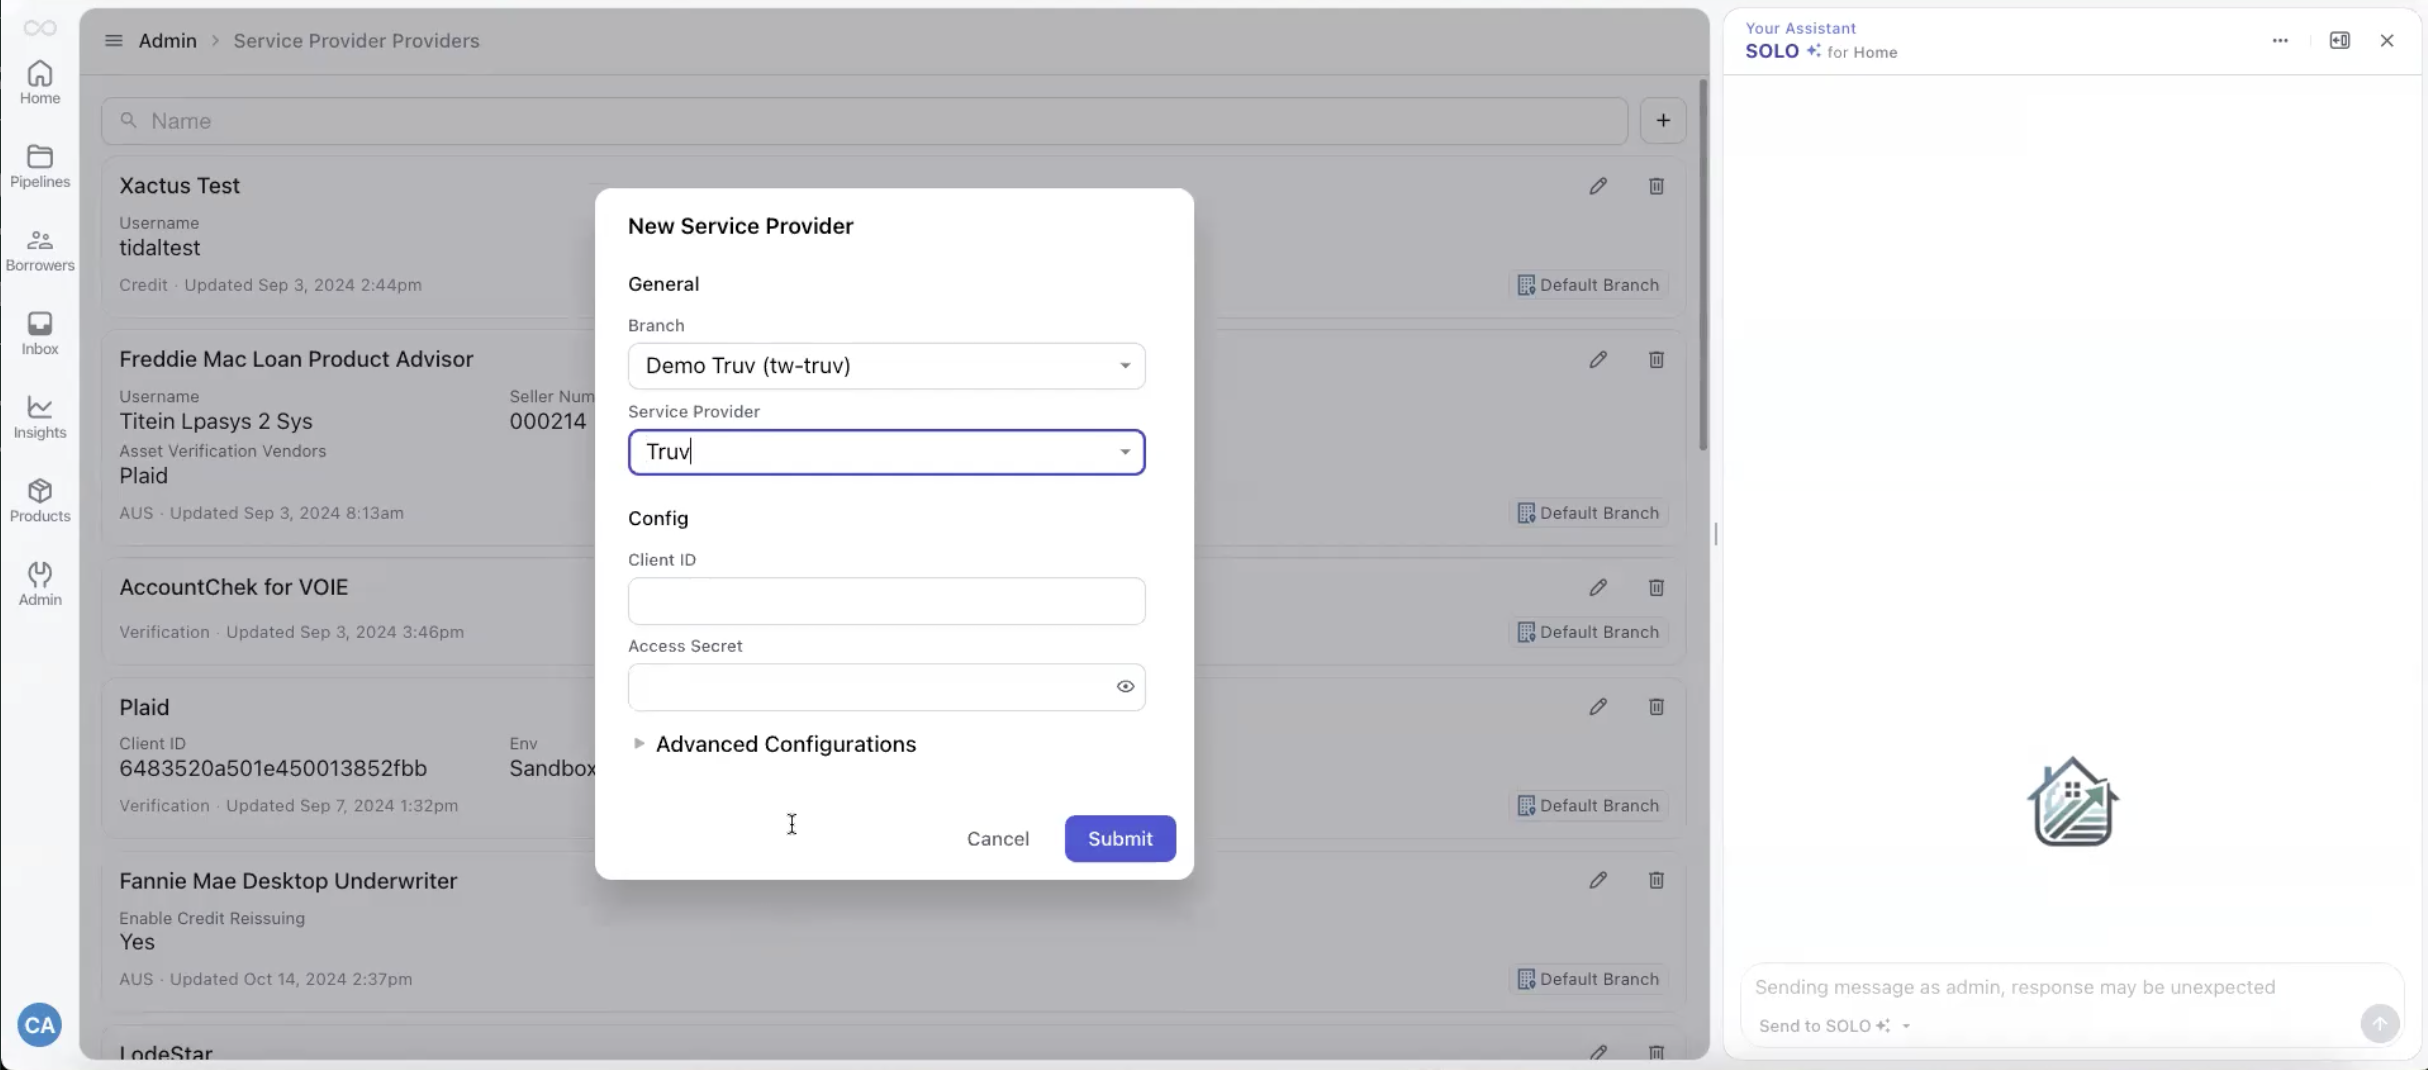
Step 1: Log in to TidalWave and navigate to the Admin tab. Step 2: Under the Integrations section, click + to add a new integration.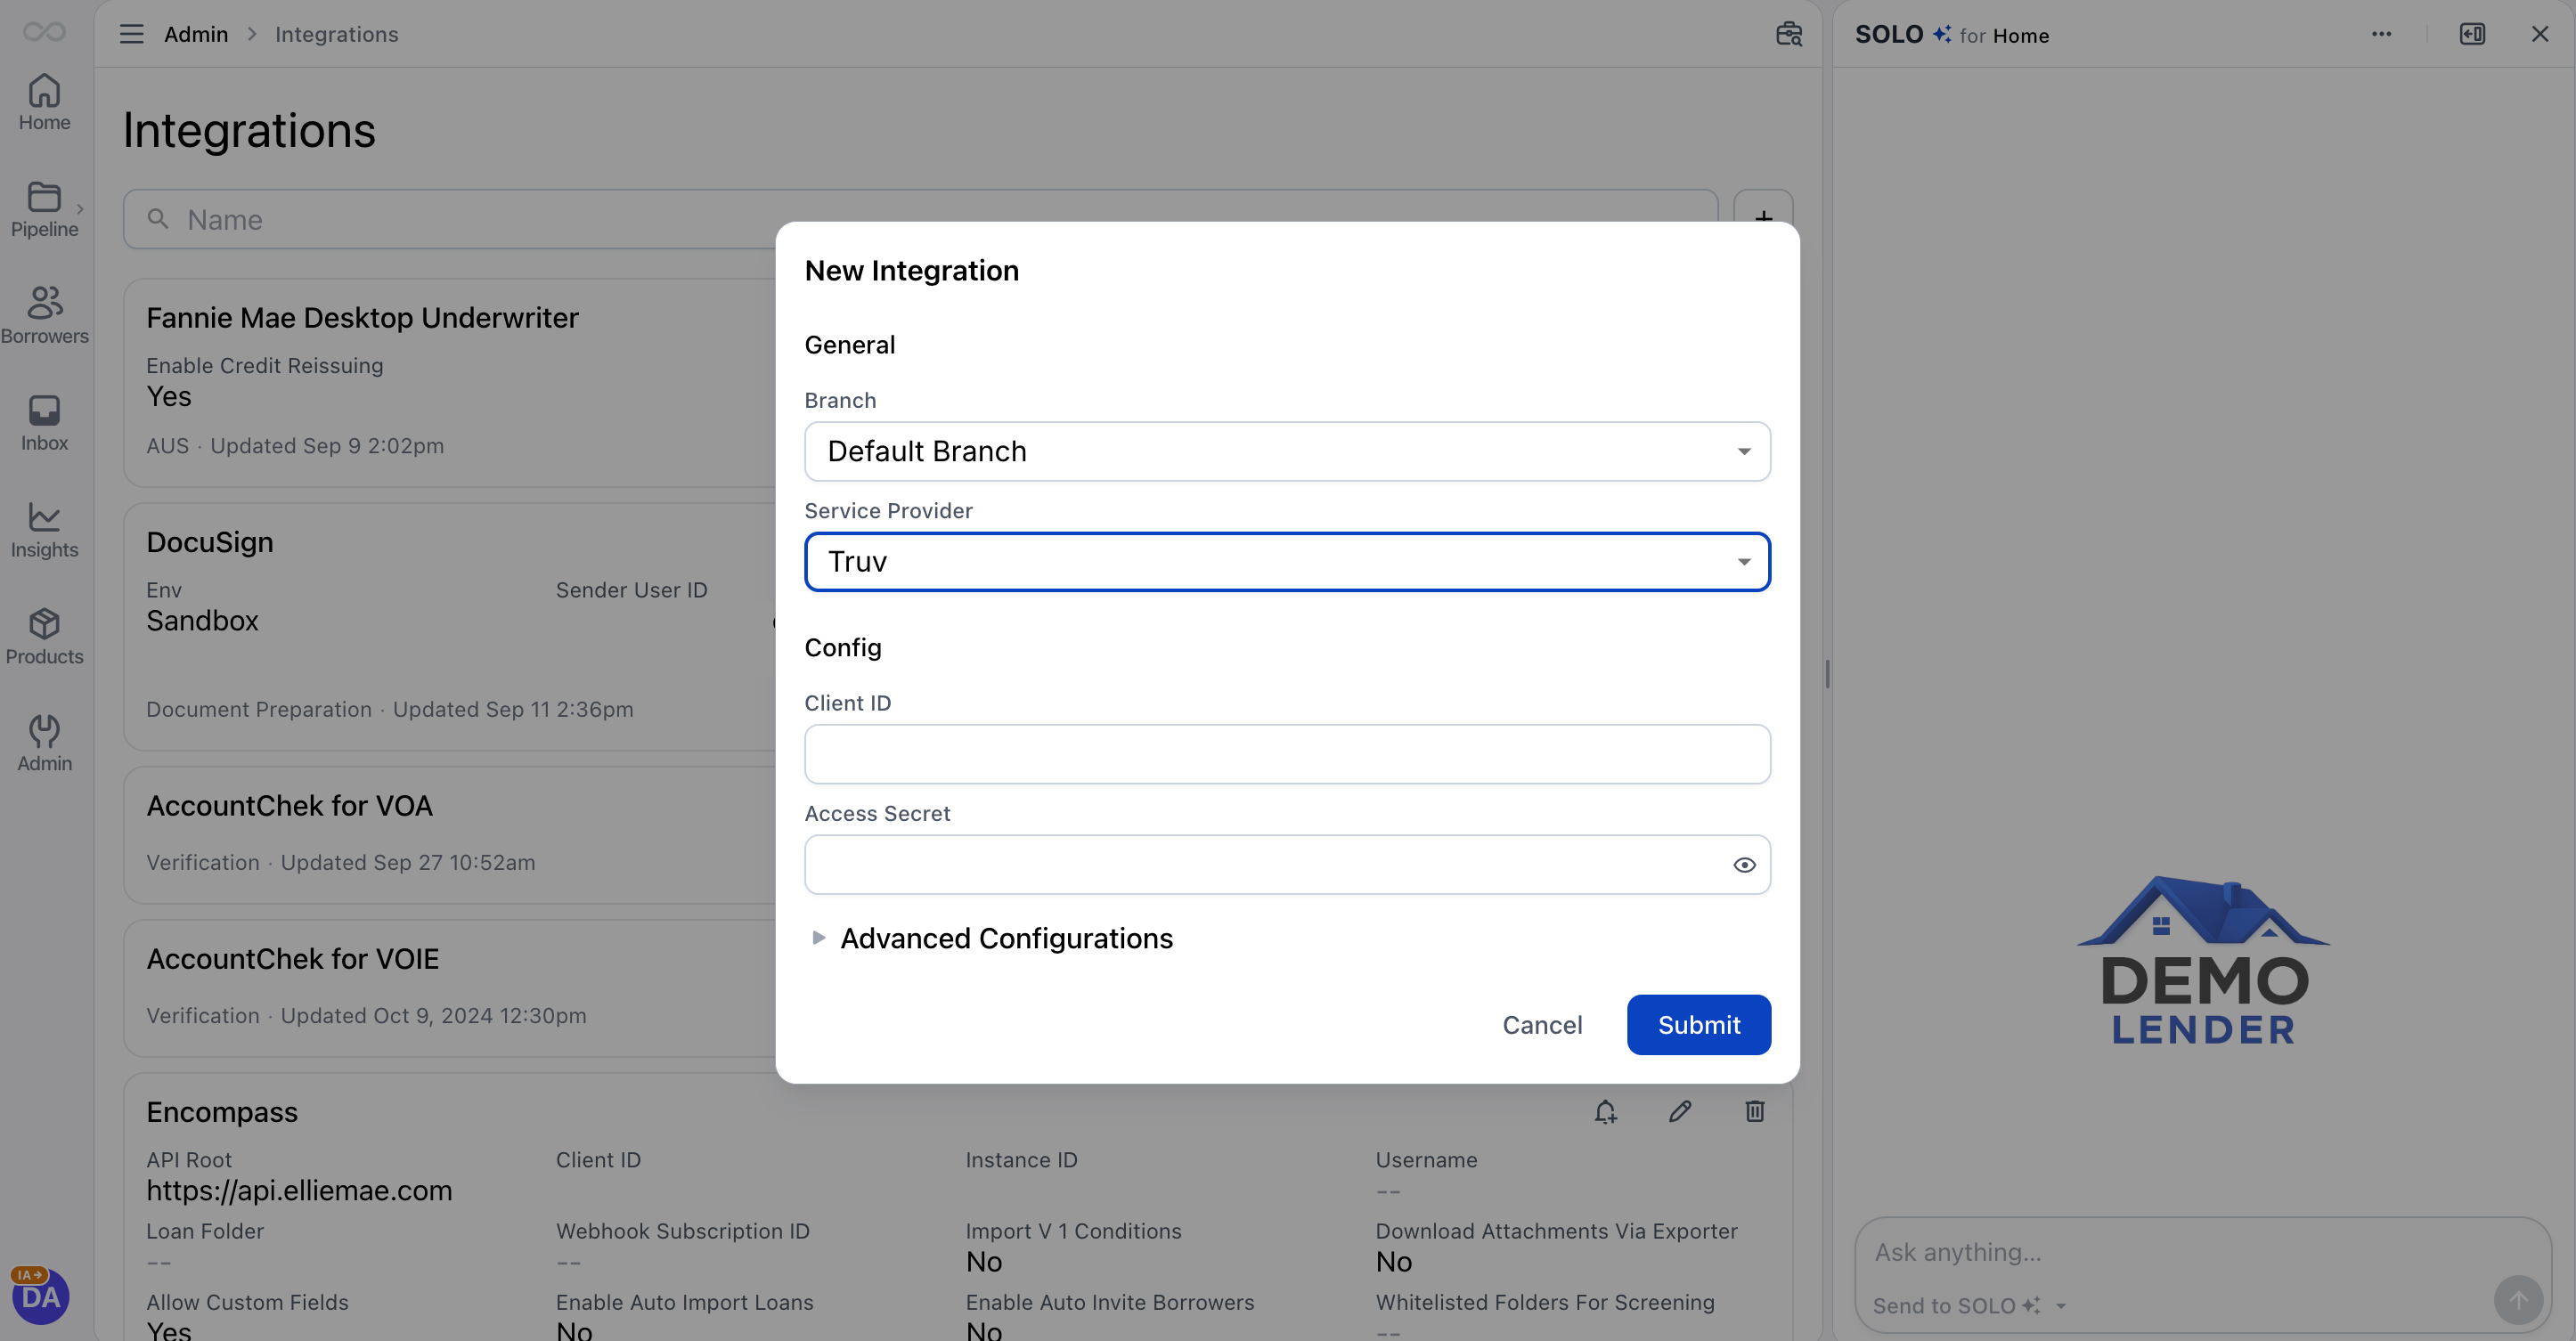 Step 3: Select the Default Branch or a specific branch to apply the integration to.
Step 4: Add your Truv credentials:
Step 3: Select the Default Branch or a specific branch to apply the integration to.
Step 4: Add your Truv credentials:
- Go to your Truv Dashboard and navigate to Development → API Keys
- Copy your Client ID and Access Secret
- Paste both into the corresponding fields in TidalWave
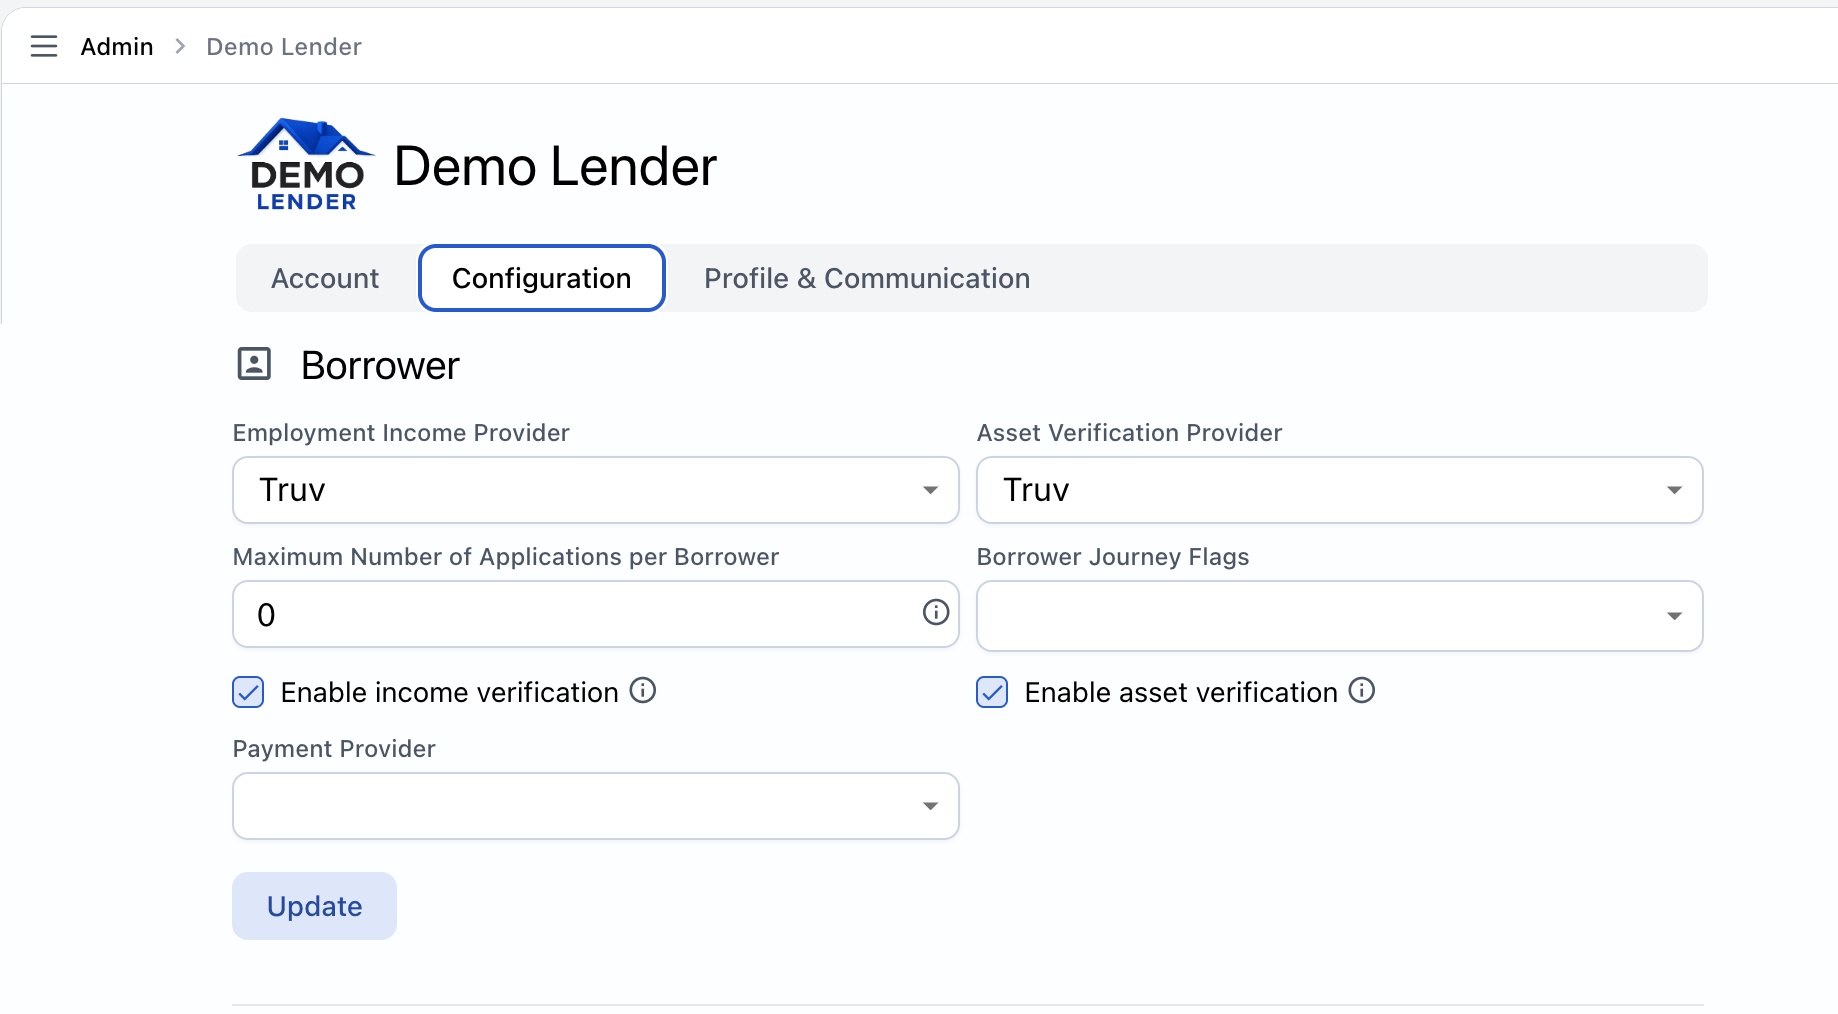
 Step 5: In Company Configurations, enable Truv as the provider for:
- Employment Income Provider (for VOIE)
- Asset Verification Provider (for VOA)
Test in the sandbox environment before switching to production credentials.
Borrower workflow
When verification is triggered:- The borrower authenticates using their payroll credentials or a one-time passcode
- Truv verifies the data and checks for potential fraud
- A structured report with income, employment, and asset data is delivered to TidalWave for loan officer review
- If the borrower skips the step, a follow-up task is automatically created in TidalWave
Next steps
POS Integrations
View all POS integration options
Sandbox Testing
Test your integration in sandbox
Support
Truv Support
POS Integrations
All supported POS systems