Instant Verification
Quickly verify employment and income details
Reliable Data
Trustworthy information sourced directly from reputable payroll providers
LOS Integration
Documents and verified data delivered automatically to connected LOS eFolder
Branch-Level Customization
White-labeled templates configurable per branch for a consistent borrower experience
How it works
Borrower connects payroll
Borrowers securely link their payroll accounts through Truv’s white-labeled widget, embedded in the LiteSpeed borrower experience.
Reports generated automatically
Truv generates verification reports and delivers pay stubs, W-2s, and employer documents directly to the connected LOS. The verification data will be submitted to DU (Desktop Underwriter) and LPA (Loan Product Advisor) systems for loan decisioning.
Go Live with Truv in LenderLogix
Contact LenderLogix Customer Success
Reach out to your LenderLogix Customer Success Manager and request enabling Truv LiteSpeed integration on your account.
LenderLogix Setup Guide
Step 1: Copy Truv API Credentials
Log into the Truv Dashboard and navigate to the API Keys tab. Copy your Client ID and Secret for your environment.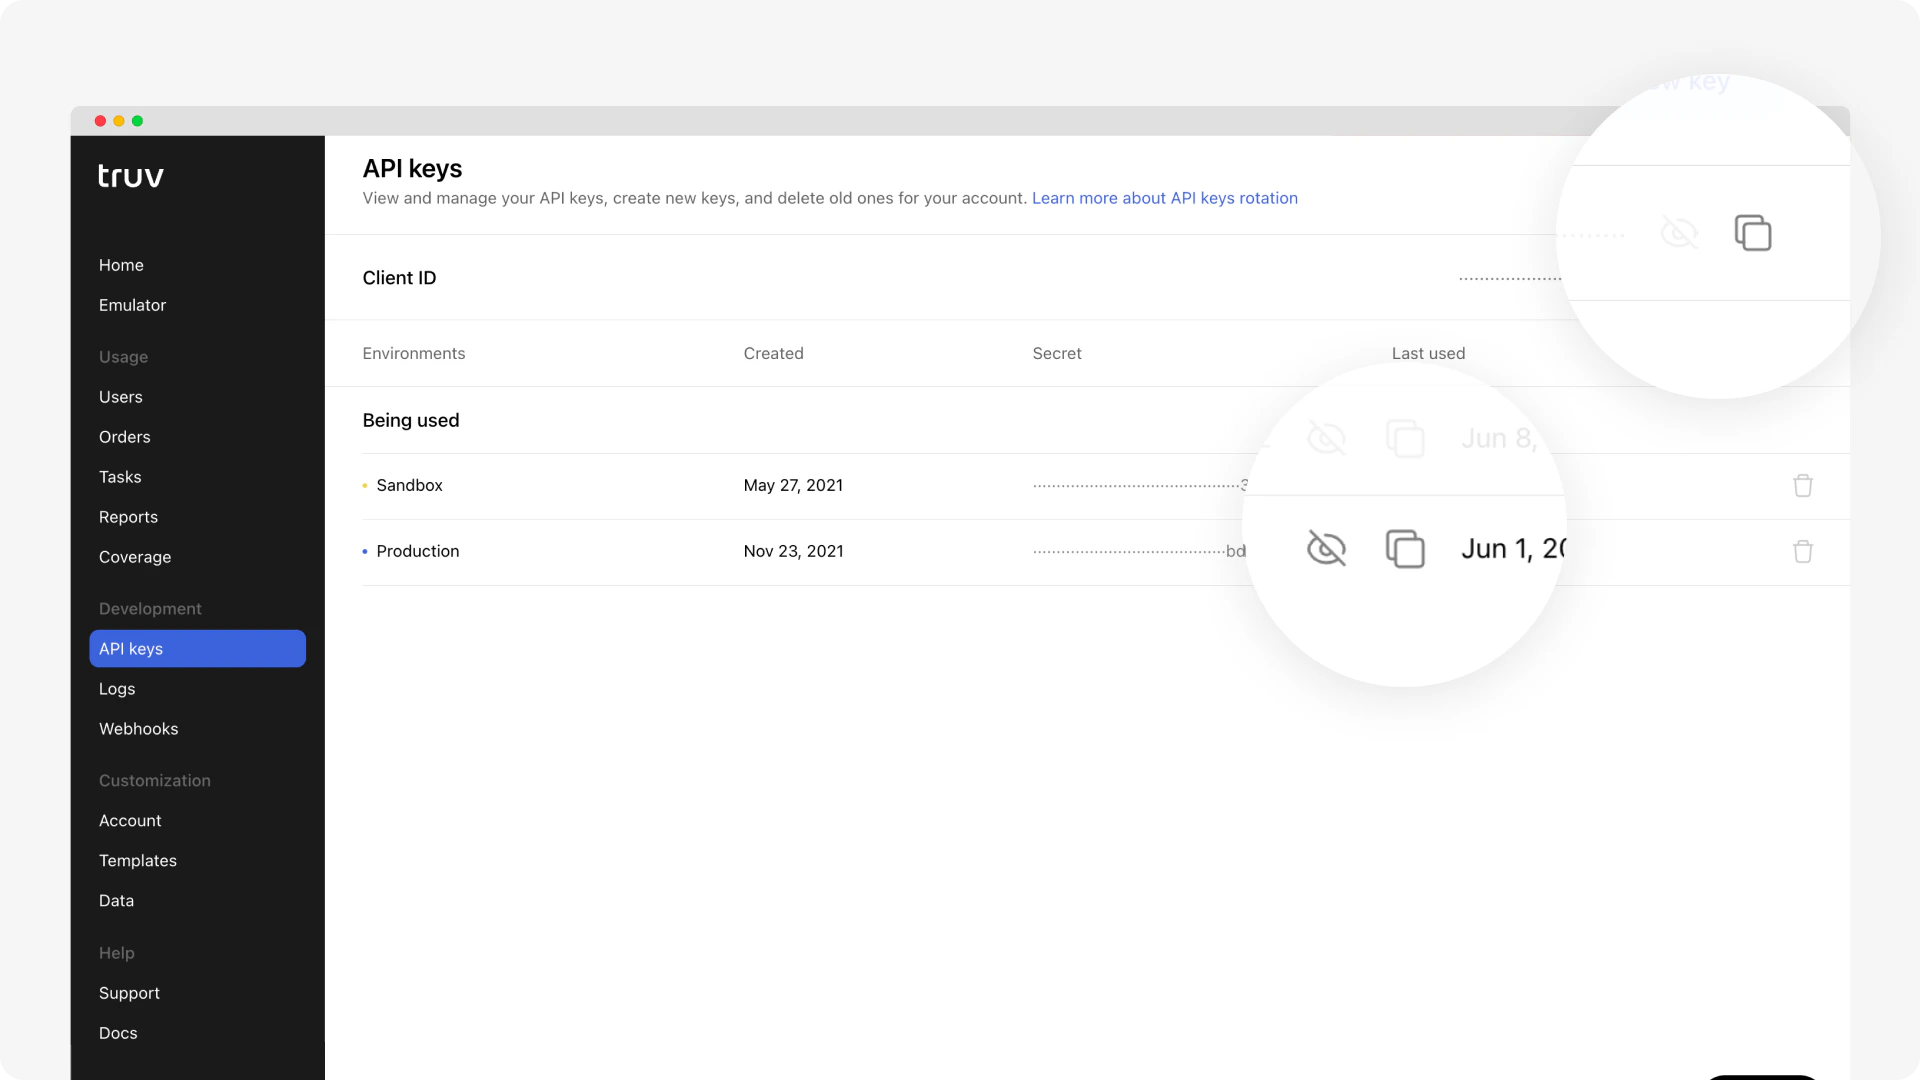
Separate secrets exist for sandbox and production environments. Use sandbox credentials for testing, then switch to production credentials before going live.
Step 2: Copy Your Truv Template ID
Navigate to the Templates tab in the Truv Dashboard. Select your desired template and copy the Template ID.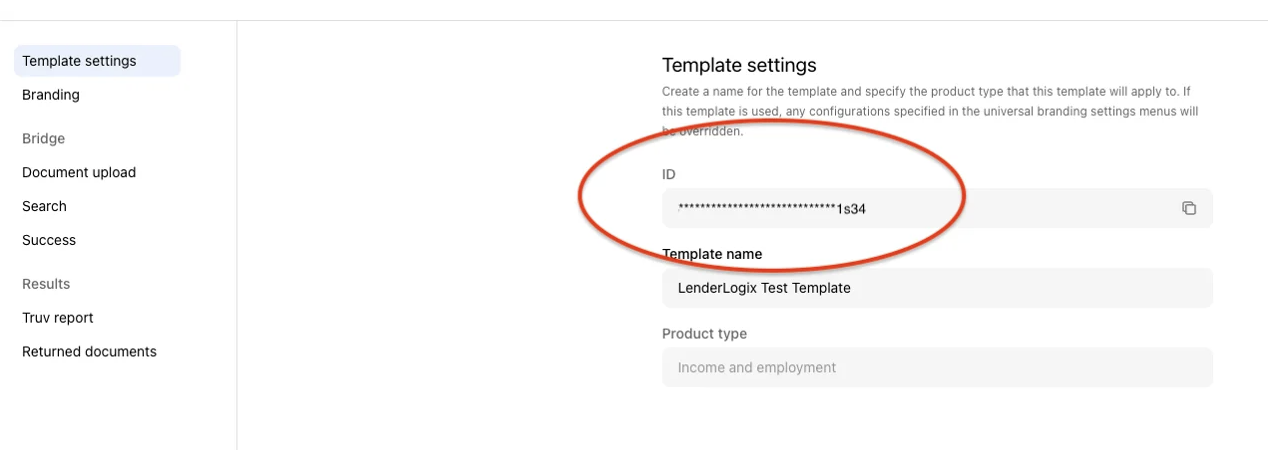
Branch-level configuration is supported. Create separate templates per branch for white-labeled borrower experiences.
Step 3: Add Credentials and Template ID to LiteSpeed
Log into your LiteSpeed account and navigate to the Advanced LiteSpeed Settings page. Paste the Client ID, Secret, and Template ID into the appropriate fields and save.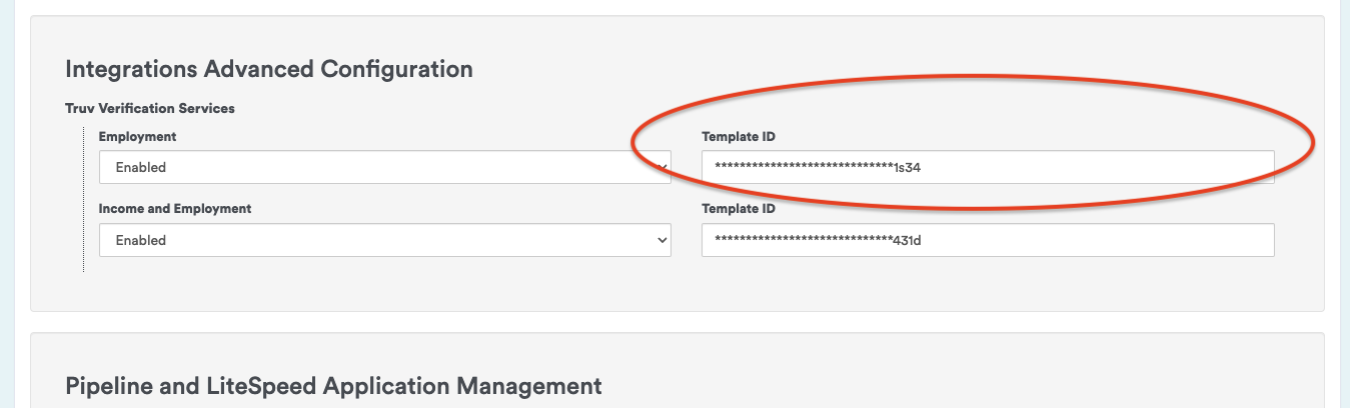
Step 4: Confirm the Needs List Task
Applicants will see a task on their Needs List to verify employment and income. After verification, loan officers receive notifications and Truv documents are added to the Encompass® eFolder.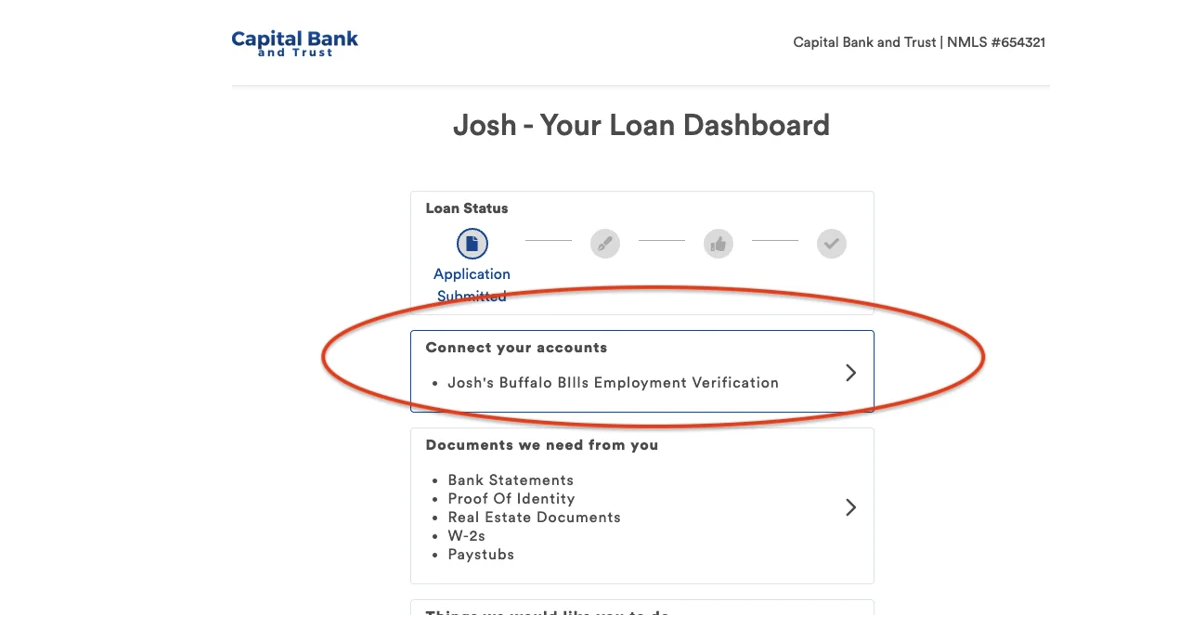
Borrower workflow
Borrowers upload employment details in the Upload Documents section of LiteSpeed and are prompted to connect their payroll accounts via Truv. After connecting, documents and verified data flow automatically to the connected LOS.Next steps
POS Integrations
View all POS integration options
Sandbox Testing
Test your integration in sandbox
Support
Truv Support
LOS Overview
All supported LOS systems