Key Benefits
- Seamless Integration — Direct integration enabling smooth transition from loan origination to verification
- Fast and Accurate Verifications — Automate income and employment verifications with quick turnaround
- Efficient Workflow — Keep the entire verification process within BYTE Software
- Customization Options — White-labeling and workflow customization available via Truv Dashboard Templates
- Minimized Change Management — Ready-to-use solution reducing IT burden
How it works
Borrower notification
Borrowers receive email and text notifications with a customized experience powered by Truv Dashboard Templates.
Enabling the Integration
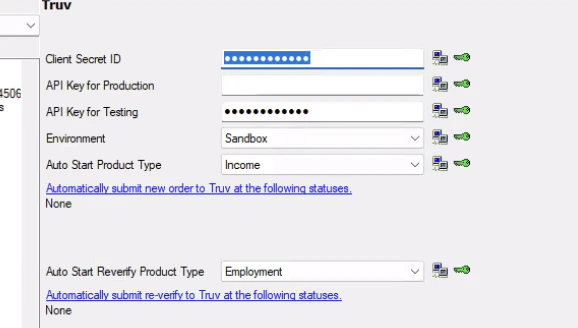
Step 1: Log in to BYTE Software and navigate to the Settings menu. Locate Truv Integration and select it. Step 2: Retrieve your credentials from the Truv Dashboard under API Keys.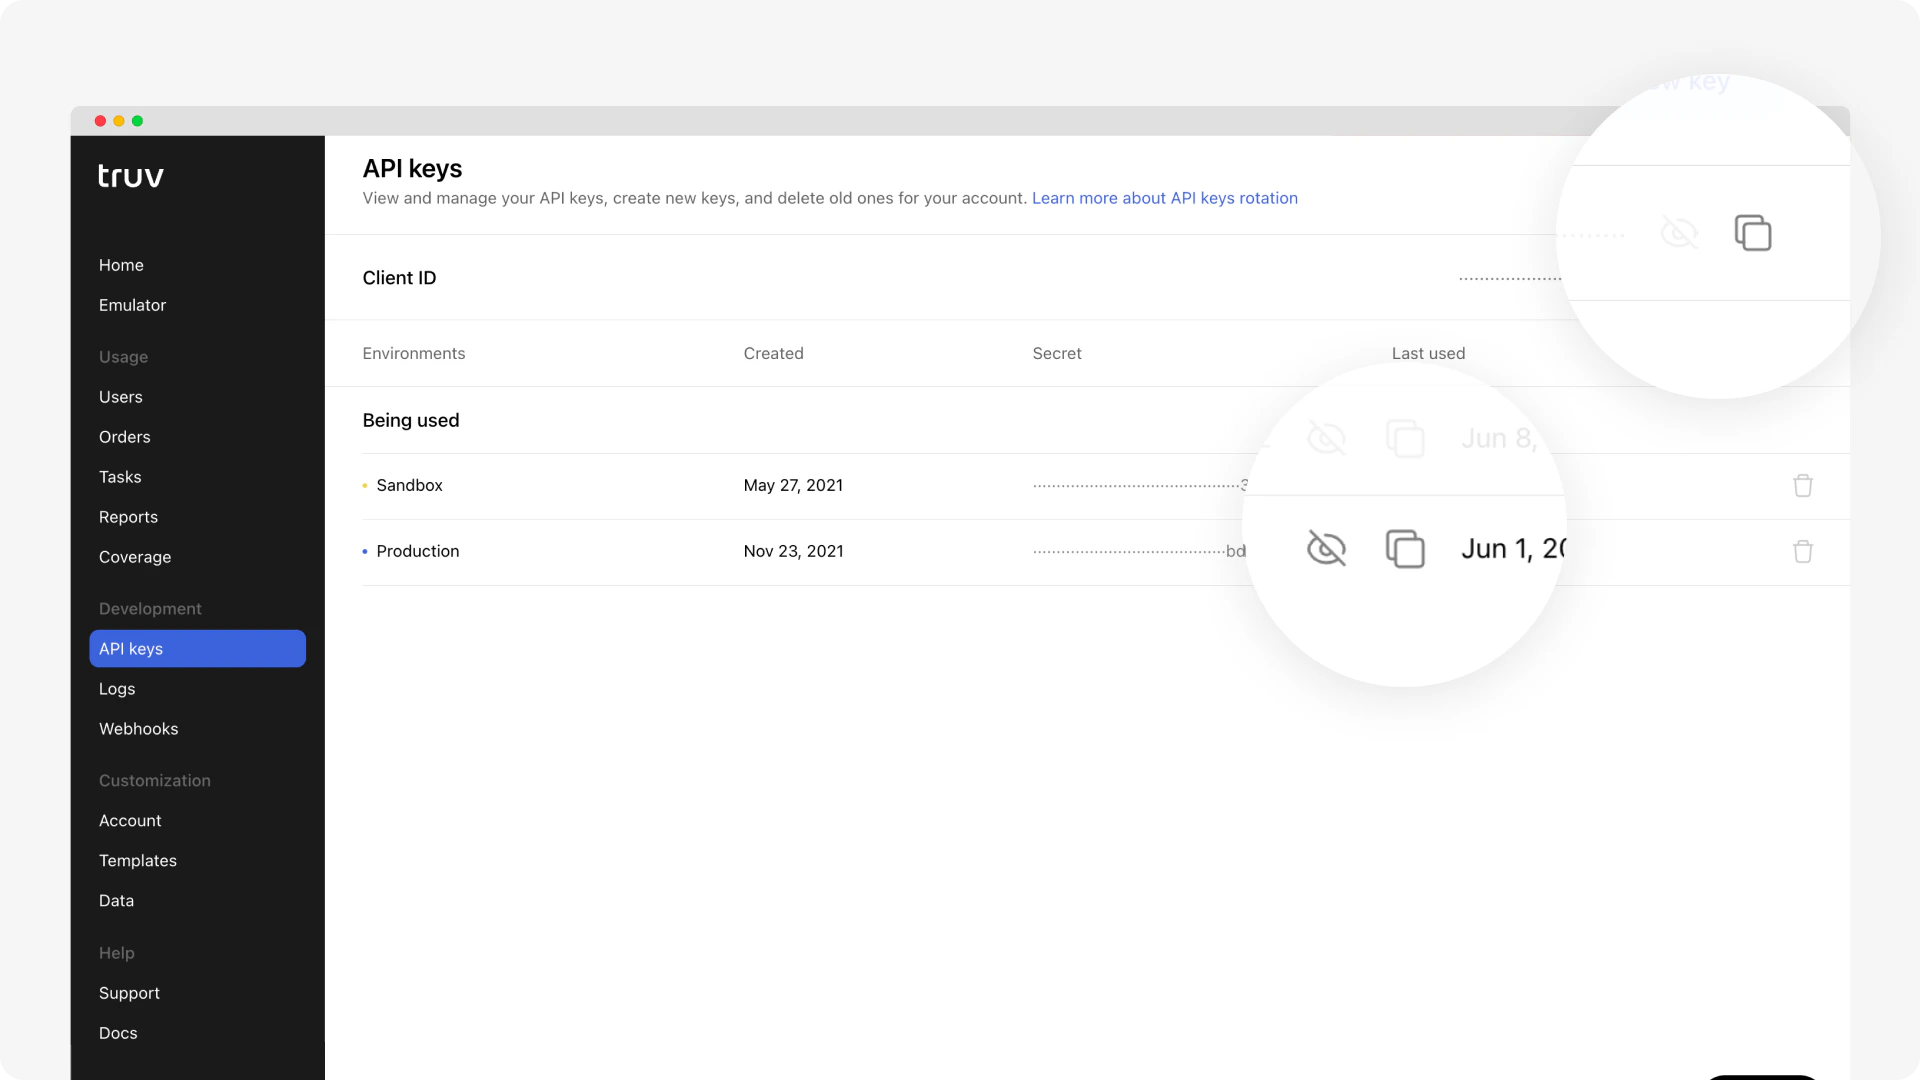
- API Key for Testing → paste your Truv Client ID
- Client Secret ID → paste your Truv Sandbox Secret (starts with
sandbox-…) - For production: add your Production Secret (starts with
prod-…) to Client Secret ID and your Client ID to API Key for Production
Order Verifications
Auto-Run
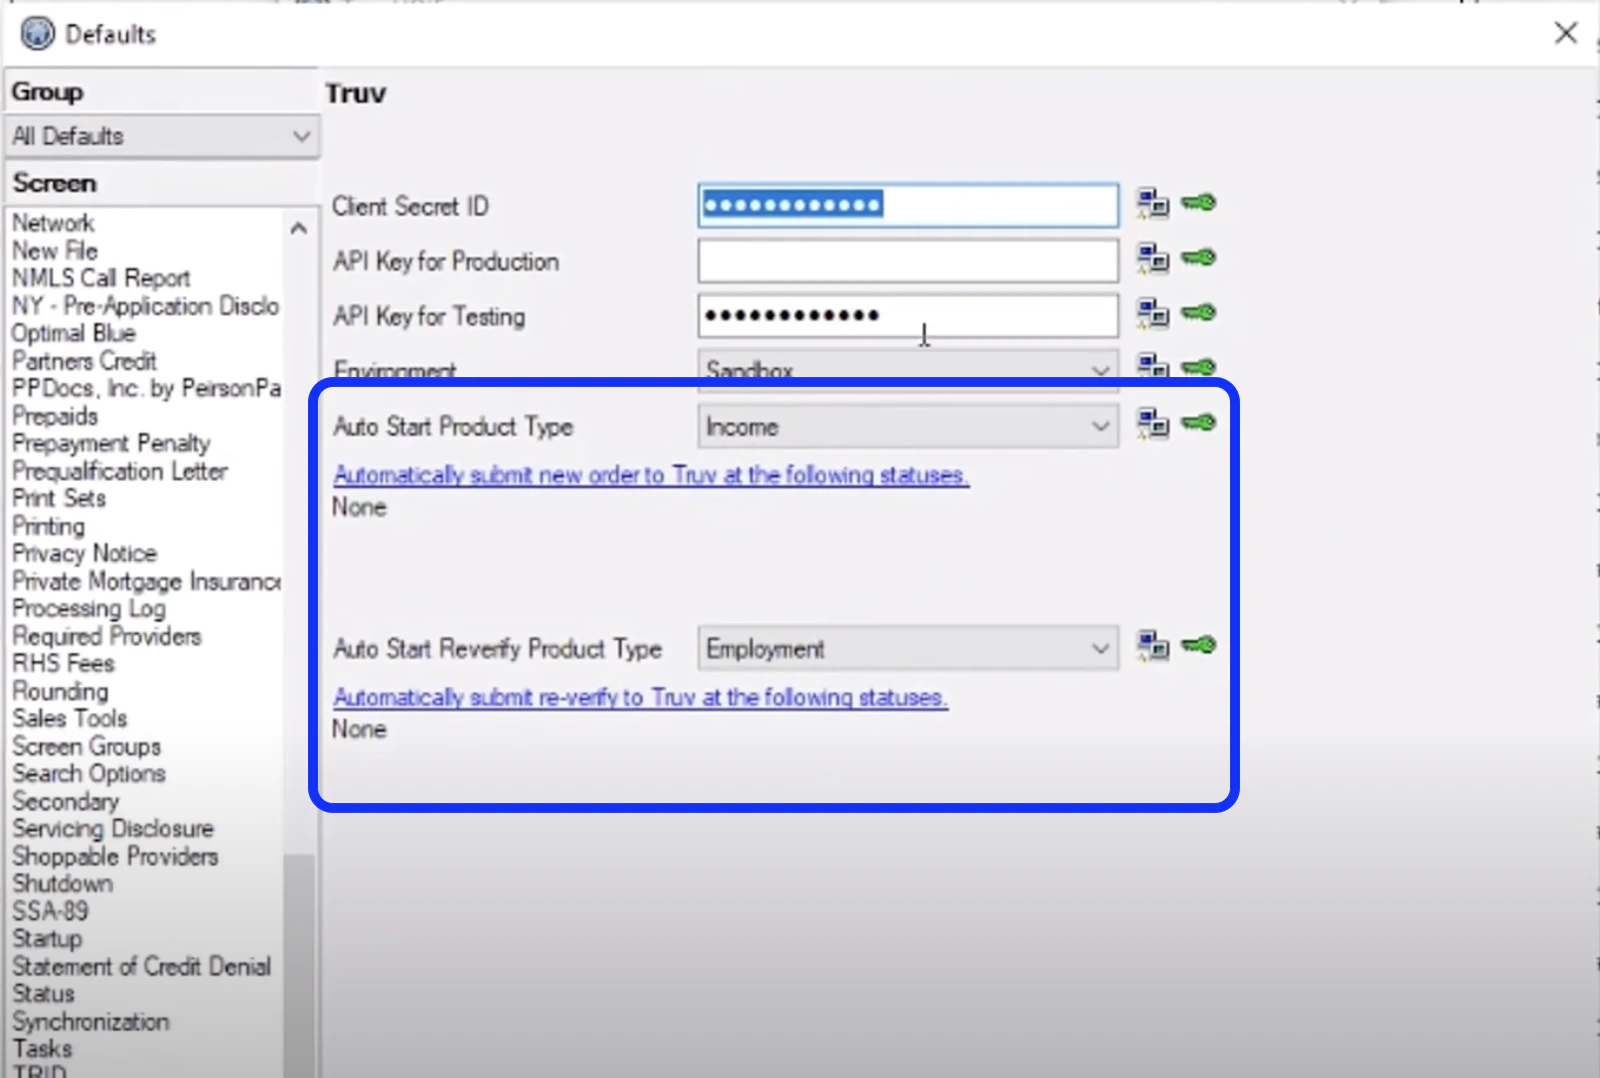
Configure BYTE to automatically trigger verifications when loan conditions are met. Step 1: Open a loan application and navigate to Interfaces → Verifications.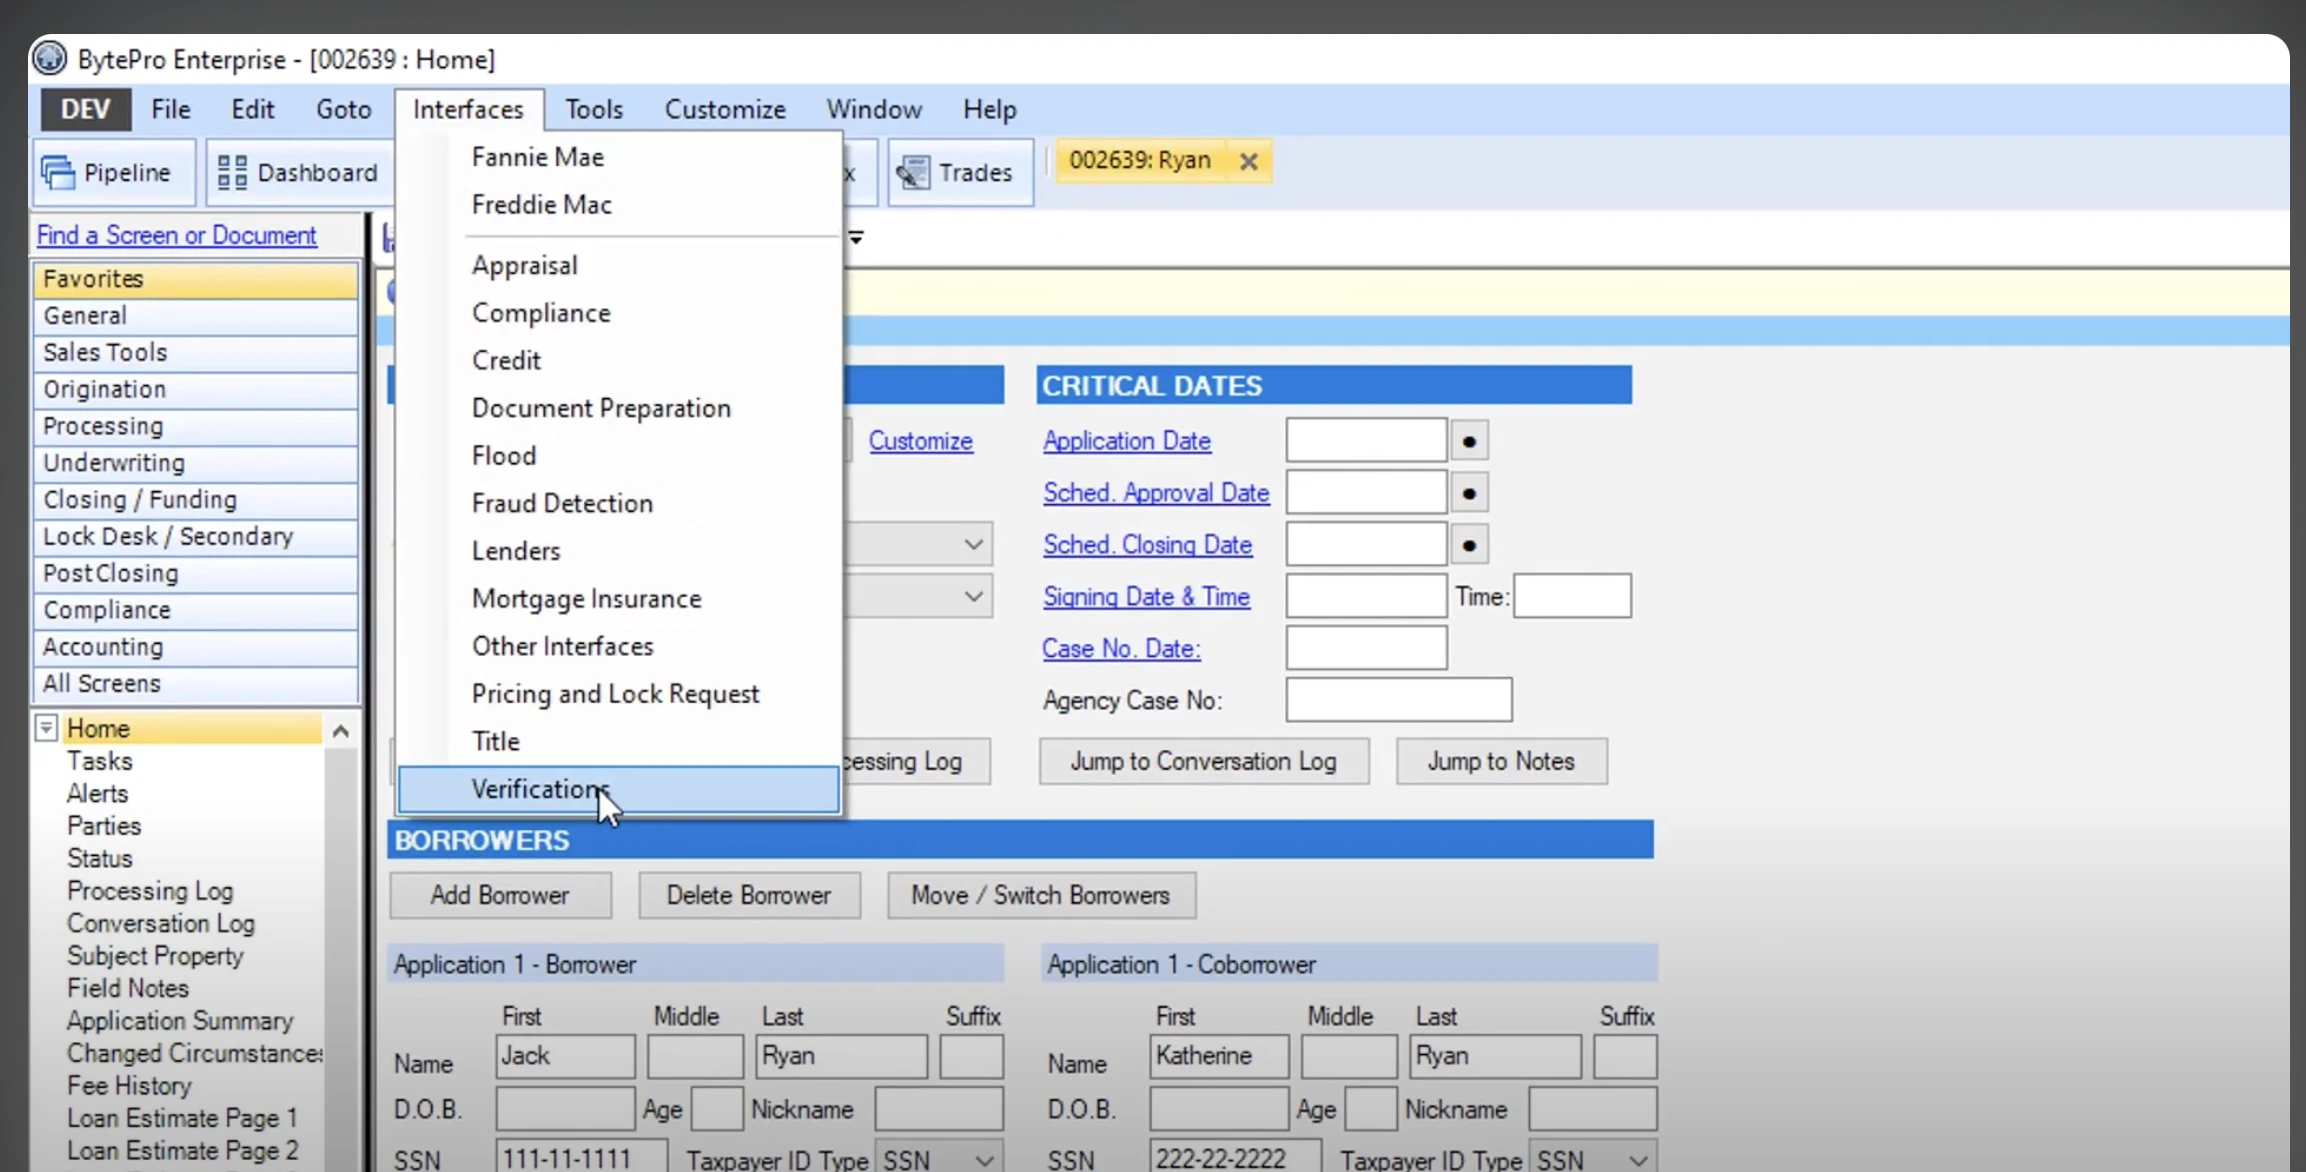

- Auto Start Product Type:
Incomefor full Income and Employment verification - Auto Start Reverify Product Type:
Employmentfor Employment-only or 10-day PCV
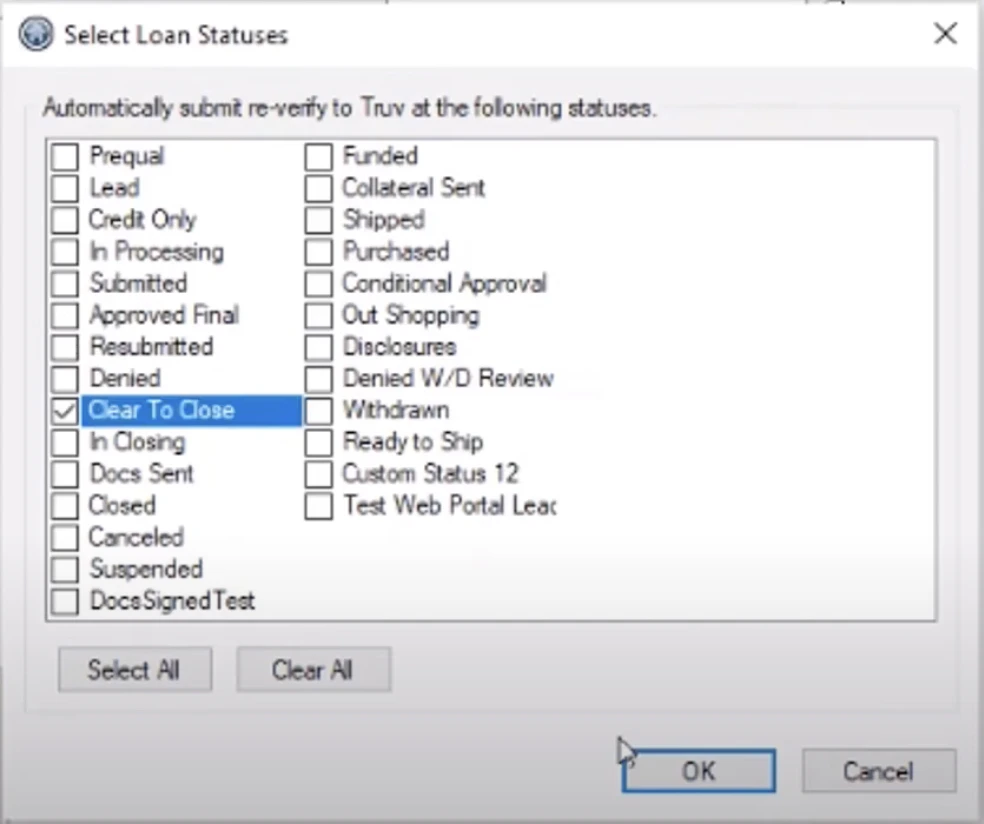
- In Processing — triggers the initial verification
- Clear to Close — triggers re-verification / 10-day PCV
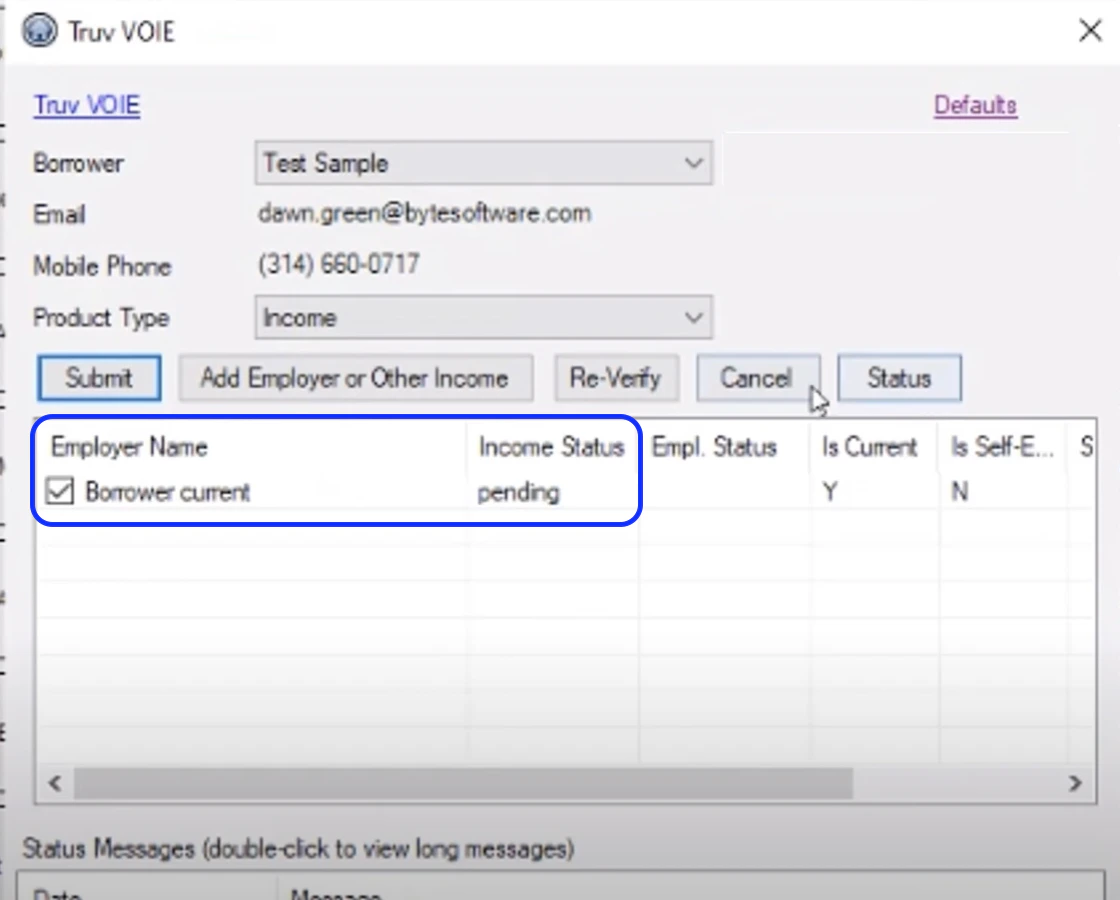
Manual Ordering
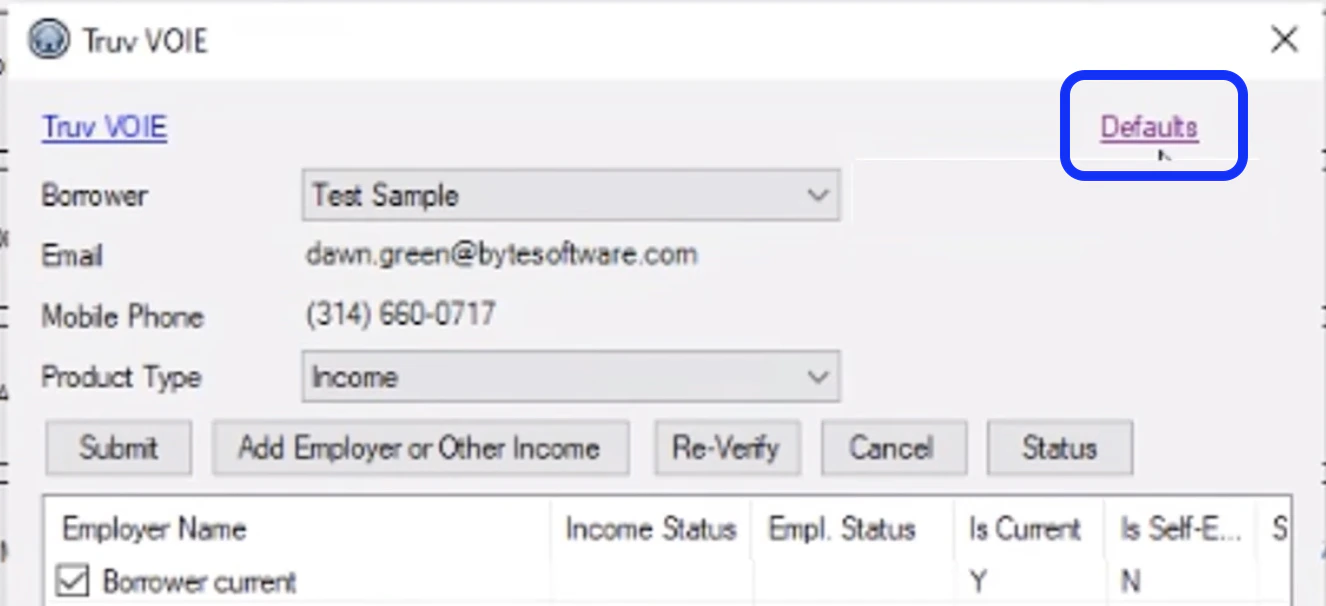
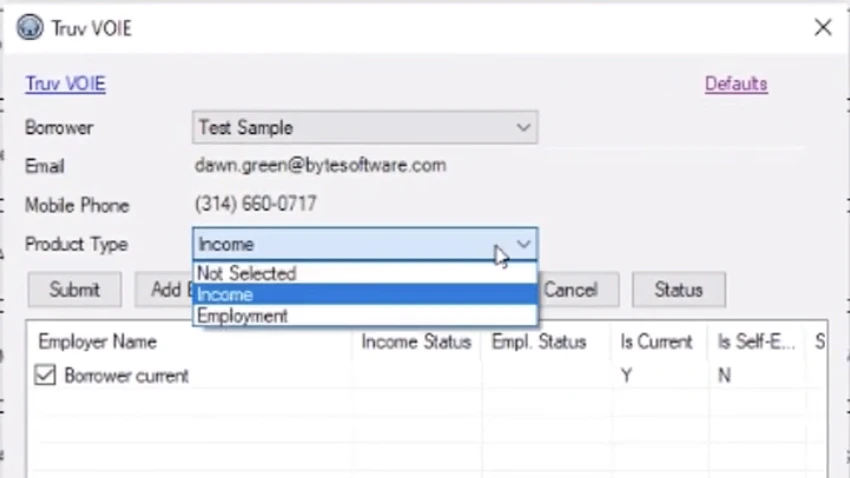
Step 1: Open the loan application and navigate to Interfaces → Verifications. Select Truv as the provider.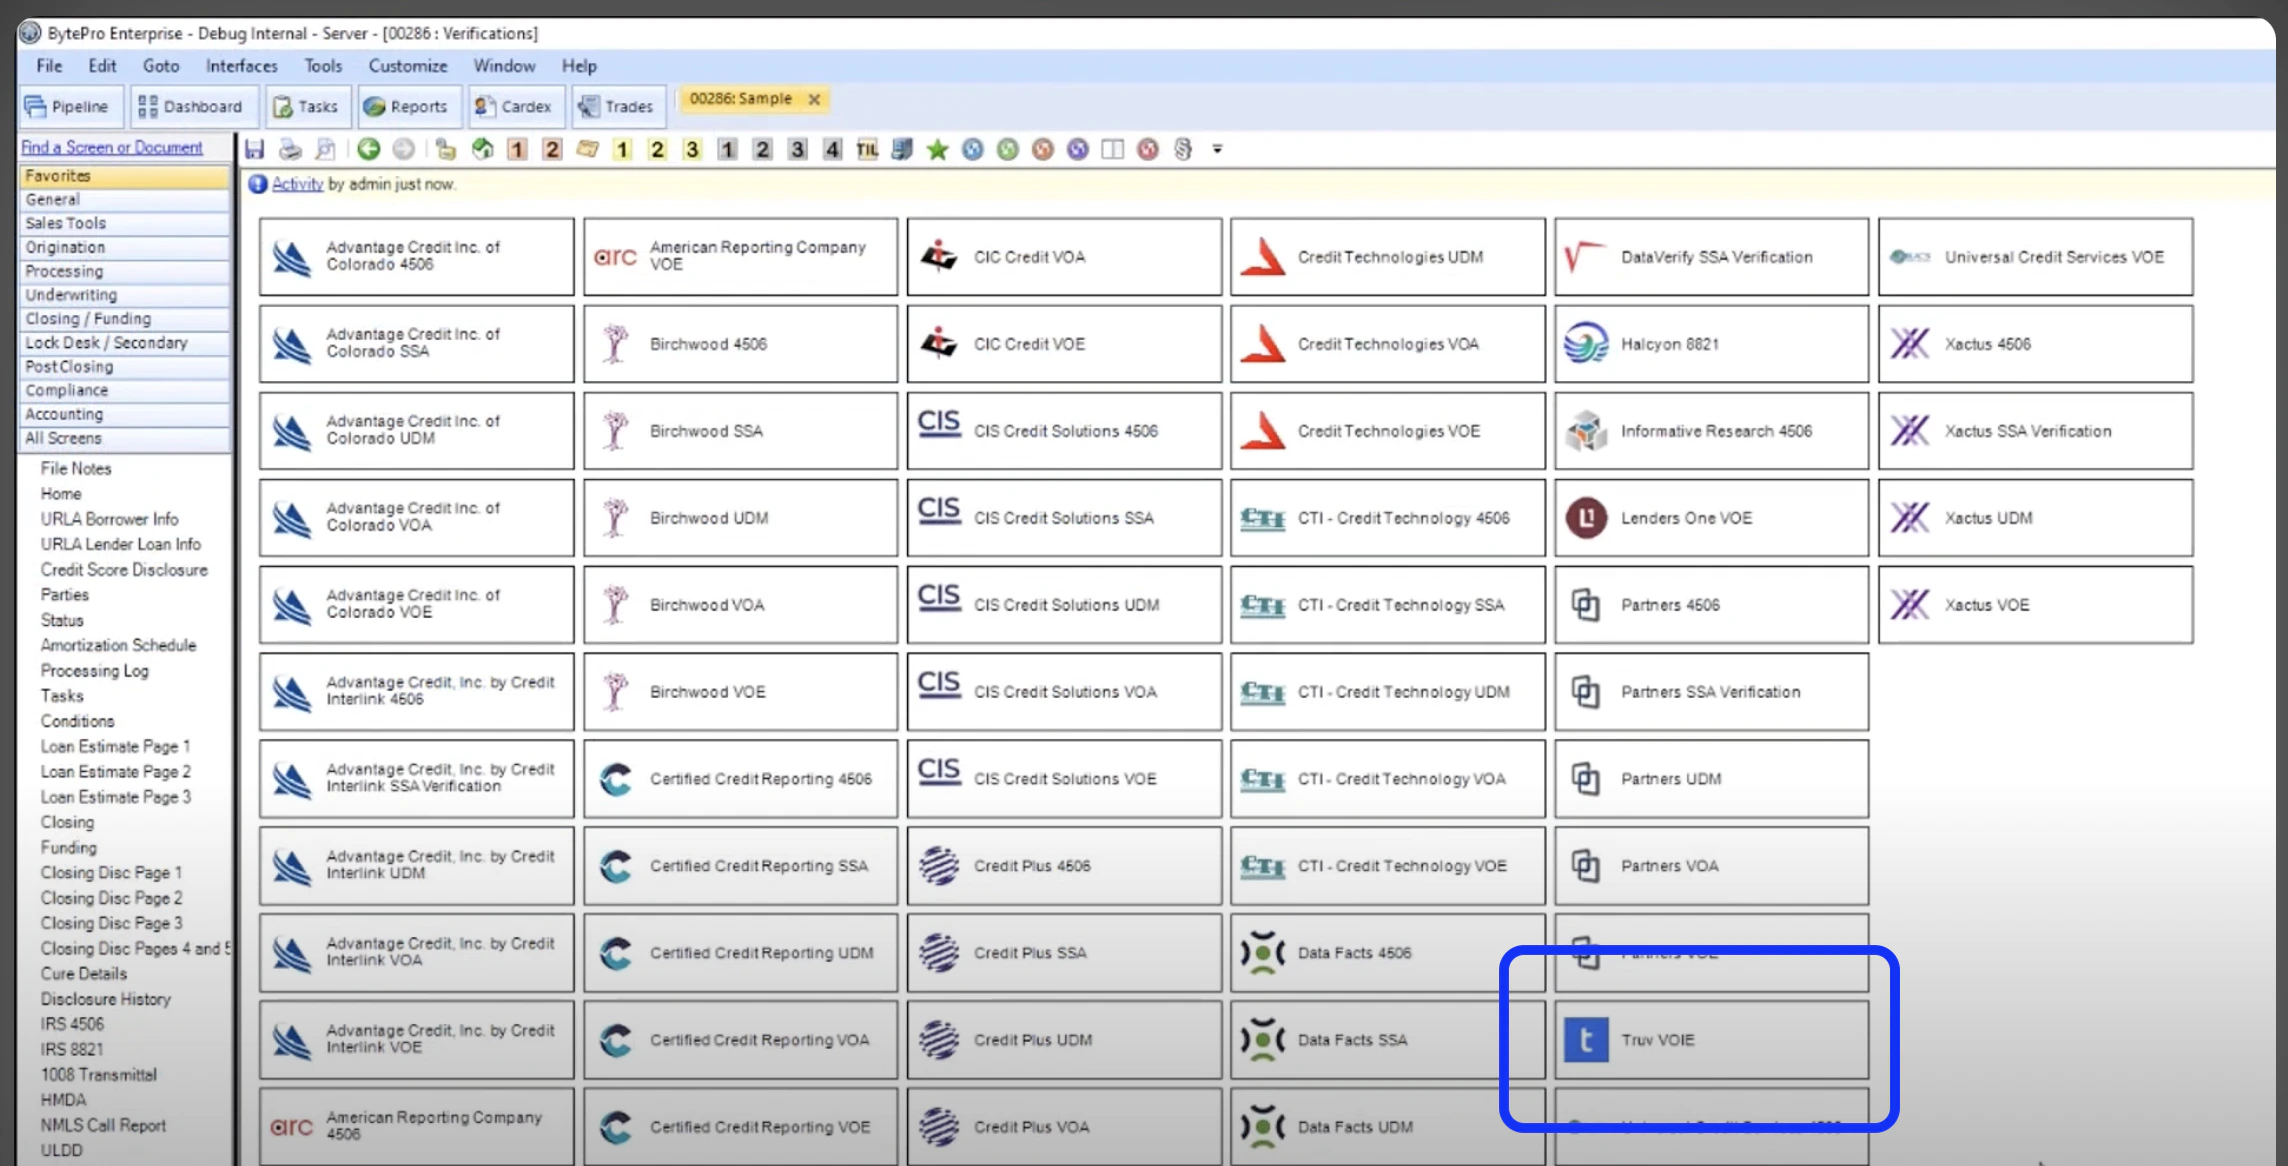

Income for Income and Employment verification, or Employment for Employment-only / 10-day PCV.
Retrieve Reports and Documents
Once verification is complete:- Access the Completed Verifications section in the loan application
- View verification details and download reports with detailed income and employment information
- Attach reports directly to the loan application for underwriting access
Video Overview
Next steps
LOS Integrations
View all LOS integration options
Sandbox Testing
Test your integration in sandbox